How to Edit Photos Professionally: A Complete Beginner-Friendly Guide
In today’s visually driven world, high-quality photos are essential—whether you’re a photographer, business owner, social media influencer, or just someone who loves capturing life’s moments. But here’s the truth: a good photo is often made great through professional editing.
Photo editing is more than just applying filters or adjusting brightness—it’s an art that involves enhancing details, correcting flaws, and making an image pop while keeping it natural. If you’ve ever wondered how to edit photos professionally, this guide will walk you through everything step-by-step in a simple, easy-to-follow way.
1. Understanding the Basics of Professional Photo Editing
Before diving into tools and techniques, you need to understand what makes a professionally edited photo stand out.
Professional photo editing focuses on:
- Color correction – Adjusting white balance, tones, and hues for realistic or artistic effects.
- Exposure control – Ensuring the image isn’t too dark (underexposed) or too bright (overexposed).
- Sharpness & clarity – Making sure details are crisp and textures are visible.
- Retouching – Removing imperfections while keeping the subject’s natural look.
- Composition enhancement – Cropping or straightening the photo for balance.
💡 Pro Tip: Professional editing should make a photo better without making it look fake or overly processed.
2. Choosing the Right Photo Editing Software
Your choice of software will determine how much control you have over your editing process.
Here’s a quick comparison:
| Software | Best For | Skill Level | Price |
| Adobe Photoshop | Detailed edits, retouching, creative effects | Intermediate to Pro | Paid |
| Adobe Lightroom | Color correction, batch editing, organizing photos | Beginner to Pro | Paid |
| GIMP | Free Photoshop alternative | Intermediate | Free |
| Canva | Quick edits, social media graphics | Beginner | Free/Paid |
| Snapseed | Mobile editing | Beginner | Free |
💡 Pro Tip: If you’re starting out, try Lightroom or Snapseed for easy learning, then move to Photoshop when you want advanced control.
3. Preparing Your Images Before Editing
A professional editor always starts with good-quality raw material. That means:
- Shoot in RAW format – This captures more data than JPEG, giving you more flexibility in editing.
- Use proper lighting – The better the lighting during the shoot, the less you’ll have to fix later.
- Check your composition – Avoid extreme cropping during editing, as it reduces quality.
4. Step-by-Step Guide to Editing Photos Professionally
Here’s a simple workflow you can follow for any image:
Step 1: Crop and Straighten
- Remove unnecessary background distractions.
- Align horizons and straighten tilted shots.
Step 2: Adjust White Balance
- Correct unnatural color casts.
- Warm up or cool down your image based on the mood you want.
Step 3: Fix Exposure
- Increase or decrease brightness.
- Adjust contrast to make the image pop.
- Fine-tune shadows and highlights for balanced lighting.
Step 4: Enhance Colors
- Boost saturation for vibrant colors (but avoid making them unnatural).
- Adjust hue to make skin tones look natural.
Step 5: Sharpen and Add Clarity
- Make important details crisp.
- Be careful not to over-sharpen, as it can cause noise.
Step 6: Retouch (If Needed)
- Remove blemishes, dust spots, or unwanted objects.
- Smooth skin slightly for portraits, but avoid the “plastic” look.
Step 7: Apply Subtle Filters or Effects
- A light filter can set the mood.
- Avoid heavy filters unless your style demands it.
Step 8: Save in the Right Format
- Use JPEG for web and sharing.
- Use TIFF or PNG for high-quality prints.
5. Professional Editing Tips for Different Types of Photos
Portrait Photography
- Focus on natural skin tones.
- Smooth skin slightly but keep texture visible.
- Brighten the eyes and whiten teeth subtly.
Landscape Photography
- Enhance greens and blues for a rich look.
- Increase clarity for more detail.
- Adjust shadows to bring out hidden textures.
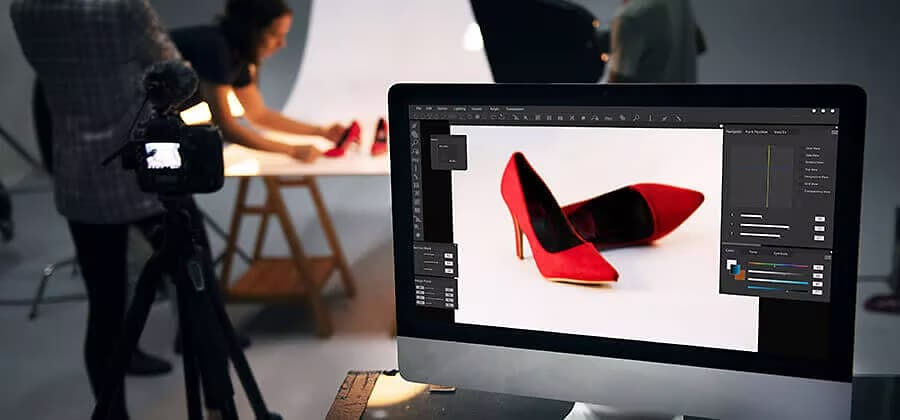
Product Photography
- Keep colors accurate for e-commerce.
- Remove dust and blemishes from the product.
- Ensure the background is clean and consistent.
6. Avoiding Common Photo Editing Mistakes
Even experienced editors sometimes make mistakes. Here’s what to watch out for:
- Over-editing – Making the photo look fake.
- Too much saturation – Oversaturated colors look unprofessional.
- Ignoring details – Dust spots, crooked lines, or strange shadows can ruin the image.
- Using only filters – While filters are quick, they often lack the precision of manual adjustments.
7. Practice Makes Perfect
The more you edit, the better you’ll get at spotting what needs improvement. Here’s how to improve quickly:
- Compare your edits with professional photos.
- Re-edit old photos to see how your skills have improved.
- Learn from tutorials and experiment with new techniques.
8. Summary: The Art of Professional Photo Editing
Professional photo editing is about enhancing, not replacing reality. With the right tools, a solid workflow, and an eye for detail, anyone can turn an average shot into a stunning masterpiece. Start with basic adjustments, avoid over-editing, and always keep your subject looking natural.
9. Final Pro Editing Checklist
Here’s a quick checklist before you call your photo “final”:
✅ Cropped and straightened
✅ Correct white balance
✅ Balanced exposure
✅ Enhanced colors naturally
✅ Sharpened without noise
✅ Retouched imperfections subtly
✅ Saved in the correct format
10. Frequently Asked Questions (FAQs)
1. What’s the difference between Lightroom and Photoshop?
Lightroom is best for organizing and batch editing photos, while Photoshop offers more detailed and creative editing options. Many professionals use both.
2. Should I always shoot in RAW for professional editing?
Yes, RAW files give you more data to work with, making it easier to adjust colors, lighting, and details without losing quality.
3. How do I make my photos look natural after editing?
Avoid over-saturating colors, over-sharpening details, and using extreme filters. Subtle adjustments usually look more professional.
4. Can I edit photos professionally using just my phone?
Yes, with apps like Snapseed or Lightroom Mobile, you can achieve professional results—though desktop software still offers more control.
5. How long does it take to learn professional photo editing?
It depends on your dedication. With regular practice, you can learn basic professional editing within a few weeks, but mastering advanced techniques may take months or years.